quilt along week 8

Welcome to week 8 of the quilt along! This quilt is a little more intense than I bargained for, I must admit. Anyone else in the same boat? The good news is there are only 2 weeks after this, then we should have completed quilt tops. Hurray! It will be worth it!

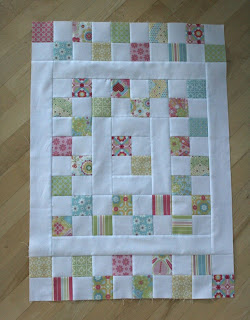
For this week we will be adding another ring of squares to the quilt center.

Make 2 strips 28 segments long, add to the top and bottom of the quilt.
Make 2 strips 32 segments long, add to the sides of the quilt.

Step back and admire your handiwork!
(I can't believe I actually got this to stay up on my design wall.)

If you are making a queen or king size (gulp!), keep adding additional rows of squares and sashing strips until you have your desired quilt size. (In other words, you are on your own now...sorry!) If you are following the twin size directions, that's where we stop for today. We have a few more rows to add to the top and bottom, but the center is complete. Yipee!

Last week a few of you mentioned that you were experiencing the same problems as I was with the strips being too long for the quilt top. My rows this week are worse than last week. Ugh. So, after easing everything in, I had some pretty wavy edges. Some sides were worse than others.

On the sides that were really bad, I went through on every other seam of the outside edge and sewed the seams at a bit of an angle in order to reduce some waves. I took a photo to show what I mean. (double click on the photo to enlarge it.)

The dotted line was my original seam line.
The solid line is my new seam line.

I think the key here is to be subtle. Make sure you angle the new seam and that it meets the original seam or you will have some nasty tucks. It's not ideal, but it's one way to make your quilt lay a little bit flatter. Oh, you will want to press your seams again after this step.

Don't forget to add your progress shots to the flickr group.

Happy Monday to you!

hello kitty mini

I'm forcing my daughter to like Hello Kitty because I think she's so cute. OK, in reality it hasn't taken that much convincing. At the retreat, Rene gave me some Hello Kitty fabric (that I may have been gushing over), and I made a hello kitty mini quilt for my daughter. Isn't it bright, happy and fun?

I used Lite Steam a Seam 2 (which came highly recommended by Carol) to adhere the circles. I would agree, it's a great product.

I stippled the whole thing, then I outlined the circles with additional quilting for stability.
For the back and the binding I used more polka dots because I LOVE them.
It measures 17" x 19".

In other news, these are the scraps that I received from Tammy today in the mail for my scrap challenge. She's really on the ball! I love that. My ideas are percolating already.

And the last thing for today...I recently learned how to knit little bitty baby booties from an elderly friend of mine. These went to one of my sisters, who is expecting her second little boy in a few months.
Look how little they are!
They are so fun! Plus, they are a great way to use up some of those yarn odds and ends.

quilt along week 7

I'm running behind this week. I hate that feeling and I have no one to blame but myself. I suppose I could blame it on my bickering children (heaven, help me!) but I don't suppose that would do any good, would it?

Ok, for this week's quilt along....

Sew together two strips that are 22 segments long. Sew them to the top and the bottom of the quilt.


Sew together two strips that are 26 segments long. Sew them to either side of the quilt.


Then, sew on the borders that measure 52 1/2" to the top and bottom.
Sew on the borders that measure 56 1/2" to either side. Press well.


Take a photo and add it to the flickr group. :)

It was a little tricky for me this week to get everything to match up. With so many seams in each strip, if you are off by even a little bit (i was), it multiplies with each seam. My strips ended up longer than they needed to be. So, I used the borders as they were cut and tried to ease in the bulk of the pieced strip. I really need to perfect my 1/4" seam allowance. It sure would make things easier!

A few other bits of business....

Tammy was selected as my scrap challenge winner. I'm looking forward to seeing what scraps I get to play with. Due to the overwhelming positive response to this crazy idea of mine, I just might make it a regular thing around here. I don't have the time or energy to organize a swap of this nature, but someone should! That would be great fun.

Also, thanks so much to the generous ladies that have sent me plaid squares. I'll be posting more about that project soon!

can i play with your scraps?

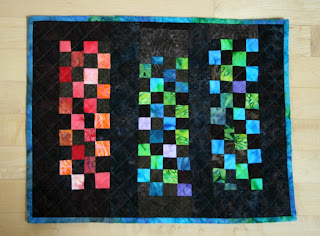
At the retreat, there was quite a lot of smack talk between Shelly and me in regards to our favorite fabrics. I happen to think anything with white fabric is fabulous, (shocking, i know!) while she has a deep love for batiks. (Could you get any more opposite?) At some point a challenge was issued and I had to accept. She sent some batik scraps home with me, and I shared some fabulous white fabric with her. ;) We decided we would make each other a small project using the said materials. She can not add any batiks to her quilt and I could not add any white to mine.

Now, I'm not particularly fond of batiks (my husband thinks they are nasty)...but I must say, it was a great creative exercise. I loved the challenge! I could even get used to batiks. Maybe! I do like their saturated colors and the fabric itself is just so sturdy. Somehow it was easier for me to use scraps rather than whole fat quarters or yardage.

Anyway, this is the mini quilt that I came up with. It measures about 14" x 17".

I liked it so much I wanted to keep it, so I'd call that a success.

This whole exercise gave me an idea.....
I thought I would put this challenge out to my readers...can I play with your scraps? If anyone is interested, this is how it would go. I will select a random name from the comments. That person would send me a small bag of scraps. I'll use the scraps to make a mini quilt and send it back to the person who provided the scraps. Doesn't that sound like a whole lot of fun? If you are interested, leave me a comment on this post.
---
edited to add: Tammy was selected via the random number generator, so I'll be playing with her scraps. Thanks for all the interest in this idea. I think it's going to be a whole lot of fun. :)

my house quilt!!!

houses!
I finished my house quilt! Yipee!!!!!

Thanks so much to my sew connected friends for helping me make such a fun quilt!

The quilting is intense. I quilted the dog out of it, to use Shelly's phrase. Oh, goodness!!! All those houses were way more intense than pebble quilting. I had a hard time with thread breaking many, many times, but I eventually worked through it and finished. Then I breathed a huge sigh of relief. :) The resulting texture makes it totally worth it, though.

For the back, I used a sheet from Target. It's nice and soft already. I can imagine that it will keep getting better and better the more it's used and washed.

When I got to the binding, the last thing I wanted to do was to piece it as in the inspiration quilt. But, I did it anyway. I'm so glad I did. A plain white binding wouldn't be the same. I love how the one orange piece landed on the corner.

The quilt measures 60" square.

quilt along week 6

Welcome to week 6 of the quilt along. The quilt is really coming together now. Only a few more weeks and we will have a completed quilt top! Yipee!

I'm simplifying the instructions a bit this week because it's more of the same piecing as the previous two weeks.

Make two strips 16 segments long for the sides.
Make two strips 20 segments long for the top and bottom. (Or vice versa. It really doesn't matter.)
Remember to keep in mind the invisible zig zag pattern that should form when you place your strips as discussed in last week's post. (I almost messed up this round.)
Sew the strips to the center block and press well.

Add the sashing strips that measure 40 1/2" to the top and bottom.
Add the sashing strips that measure 44 1/2" to either side.

Press well and admire your handiwork!
The quilt should measure 44 1/2" square at this point.

Feel free to add your photos to the quilt along group on flickr. There are some fun progress shots being posted. Thanks for quilting along with me!

giveaway winners

Thanks for all the comments! Holy moly, you guys sure love fabric and ice cream! :) The winners are: Crys and Nanann. Thanks to everyone for playing along! The question came up several times in the comments so I thought I would answer it...no, I'm not a twin-my sister is exactly 2 years older. Have a great day!

giveaway!!!


me and my sister Clair

This past weekend I turned 35. You know how some people say that they don't feel their age? I'm not one of those people. ;) I celebrated with my sis, who also shares my birthday. No cake was involved (it's way too hot to bake) but there was LOTS of ice cream. I may or may not have had ice cream 3 times on Sunday, including my husband's favorite recipe. YUM! It was a good, good day.

In belated celebration of my official stance in the middle aged club, I'm hosting a give away. Today I have not one, but TWO roll ups to give away, compliments of Robert Kaufman fabrics. Thank you, Rob! (LOL!!!!!!!!!)

One is in the dusty color story, which is quite lovely.


The other one is in the classic color story. It's bright and fun and cheery.


Either way, you can't go wrong.

If you would like to win, leave me a comment. In your comment, tell me what your favorite flavor of ice cream is. My favorite flavor would have to be coffee....with a brownie mixed in. Mmmmm, mmmm!
I will pick two separate winners. Only one comment per person. I'll pick a winner on Saturday...after my garage sale. Oh, yeah, the fun never ends around here. :)

could you spare a square?


The past few weeks I've been preparing for the Summer Work Party for Margaret's Hope Chest. Today I'm working on quilting this "guy" quilt, which will be one of my samples for the work party. It's definitely out of my normal range as far as color schemes go, but it's really fun to branch out. I love the simple pattern! More on that later.

The problem with quilting, though, is that it gives me waaaaaaaaaaaay too much time to think. I usually dream up at least 2-5 new quilts while I'm trying to finish up the one I'm quilting. What a vicious cycle. No wonder I'm never caught up!

My main thought today was, I'd like to do another quilt in this pattern, but using khaki colored sashing (already have it!) and plaids or stripes for the squares....so kind of a mimic of a guy's wardrobe. Wouldn't that be fun? I don't have a ton of plaids hanging around my craft room and the last time I hit a garage sale and bought plaid shirts for quilting, both shirts ended up fitting my husband perfectly, so he got them. It was a happy accident!

So, I thought I'd ask you...do you have any guy shirt fabric (or guy looking plaid or striped fabric) hanging around? Could you spare a square?

These are all from shirts that my boys or husband wore. The one on the bottom right was actually the victim of an unfortunate mustard incident after church one Sunday. I salvaged what I could. :)

If you would like to help, please read and follow the specifics carefully:

Each square should be cut 6.5".

Only one per person, please.

100% cotton fabric only.

Either washed or pre-washed is fine.

Please mail in one week or less. If you can't work on the deadline, please let someone else help. The nice thing is that the square should be easily mailed in a regular envelope, so no special trip to the post office should be needed. If you are anything like me, you would count that as a bonus.

I'll assemble the squares into a quilt top and the quilt (or quilts) will be donated to Margaret's Hope Chest. (Or if I get a bunch, I reserve the right to recruit help!)

If you want to help, leave me a comment with your email and I'll get back to you.

Thanks in advance for your help!

edited to add:
Thanks for the great response! You guys are the best! I'm closing the comments because I have plenty of help. Thank you, thank you, thank you! xo

quilt along week 5

How are your quilts coming? Are you having fun with this or are all the little pieces driving you crazy?

Personally, I'm glad this is a quilt along so I can chip away at it a little each week. When you have 16 quilts on the go, any accountability is helpful.

For this week, we are going to sew more blocks together! :)

Sew 10 segments together for the top and 10 segments together for the bottom.


Sew the strips to the top and bottom of the center block and press seams.


Sew together 14 segments for the left side and 14 for the right side.

Sew them to the center of the quilt. Press seams.

Now, add the sashing pieces that measure 28 1/2" to the top and bottom of the quilt.

Add the sashing pieces that measure 32 1/2" to the sides of the quilt.

Press all your seams. Isn't that pretty?

As the borders get longer and longer from here on out, always be aware of your block placement. You should be able to draw an imaginary zig zag down the side of your quilt. And on the top and bottom of the quilt, for that matter. The blocks should always be offset. If your blocks are adjacent to each other, it may be time to get out the seam ripper.

I had a few questions regarding which way to press the seams last week. It really doesn't matter which way you press the seams, as long as the ones that meet are facing the opposite direction. I added a few arrows to this photo to illustrate what I mean. Double click the photo to see the details.

Hope that helps!

That's it for today...set aside your mess until next week! Happy sewing! :)