sewing for my sister

My sister came to visit yesterday and she mentioned that she was thinking of getting some new pillows for her couch. I'm sure she had NO idea that I would whip out some upholstery samples and pillow forms before she could even finish her sentence. It was merely a passing comment. Well, she should have known better. Ha!
I immediately started picking out suitable fabrics from my stash of sample squares that have been sitting in my closet for years. (thanks to my dear friend Amy.) Within about 30 minutes or less, I would say, she had 2 new couch pillows. Aren't they lovely???
For each pillow, I used 3 upholstery squares. No two squares are the same, but I love how well they coordinate and how much interest that adds! I made them with an envelope back so they could easily be washed. (She has 2 little boys, so this is a necessity!) And the icing on the cake? I had a few extra IKEA pillow forms on hand that are soooooo soft and smooshy and good. And they fit per-fect-ly. Sweet!

they can't all be my favorite

I made this quilt top, and it is soooooooo not my favorite. So much so that I even thought about not blogging about it. There is nothing wrong with it, but it's just not my style. However, I'm happy that the top is finally finished. I'm happier still that Margaret's Hope Chest accepts donations of quilt tops! (Isn't that fantastic???) It did give me a chance to work on my curved piecing (smaller curves are not nearly as fun as bigger ones), and it was a good exercise in perseverance. (I thought about throwing everything away at one point, but I just couldn't.) My daughter loved it, so I'm hoping that some other little girl out there will, too.

Thank you SO MUCH for all your sweet and kind comments about rescuing fabric. You all made me feel so much better!

rescuing fabric

In my post yesterday, I mentioned that I have this thing for rescuing fabric. I really do. Boy, was I glad to hear that a few of you do, too! Well, the situation is getting dire. Maybe after my admission here, I'll be on my way to recovery.
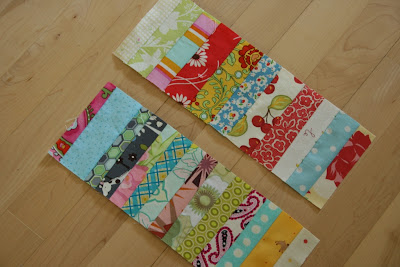
These little blocks are a good example. I cut a bunch of my less than appealing fabrics (nothing wrong with any of these, just not my cup of tea) with my Go! Cutter. I sewed them together, randomly, and it looked HORRIBLE. The problem? I didn't add enough pretties to dilute the uglies. So what did I do? Ripped the blocks apart and set them aside for another day, until I have time to start over. Why couldn't I just toss them or pass them along to someone who could use them? They really aren't worth my time and effort.

Especially when I have so many piles....
VERY pretty piles...
of fabric just waiting for my attention.
Each of the piles in the above photo represent a project that Cheryl and I dreamed up/pulled fabrics for back in March when she came to visit. Now, these are what I should be working on!

So, I don't know why I have this need to rescue fabric. Maybe because I like the challenge of making something "meh" into something great? Because I'm frugal? Because it seems like the quilty thing to do? Because I find great satisfaction in using it all, just like our Grandmas would? Because that's just the way I'm wired? Probably a little bit of each...I don't know. But the more I think about it, the more it bugs me! I wonder if there is a 12 step program that I can admit myself to? Or maybe I need to write one. Ha!

a happy accident

I'm trying to resist the urge to start a new project, and it is becoming harder by the day! I did pretty well last week finishing up some quilts, but there is still so much to do. I really let my WIP's get away from me this past winter, but I'm stubborn to the core and I'm not giving up yet.
So, today I pulled out my string scrap bin and tried to divert my attention from all the new projects calling my name. I made a few more of these free formed coin blocks. I have about 20 ideas of how I could use them. And I just stumbled upon a new one.
I received these blocks, shown above, along with a passel of scraps from someone a few years ago. They really aren't my style, but I have this thing where I feel the need to rescue fabric (I could write a whole post or two on that subject!) and apparently quilt blocks, too. I held on to the blocks because figured I would come up with a way to use them somehow, someday.
Well, it finally all clicked. I don't know what prompted me to pair them with my pieced string blocks, but wow-whee! I am smitten!!! What a difference scraps can make! I love stumbling upon happy accidents like this. The only down side is, I'm going to have to make a bazillion more blocks for my other 20 ideas. :)
One more thing! I'm featured over on Cindy's blog today. If you want to read how crazy mom quilts got it's name, click on over.

Happy Monday to you!

movin' on up

Here's my latest finish. More lime and eggplant. I love this color combo! Most of the dots are from Pat Bravo's Oval Elements collection. They are so lovely to work with and so soft. I added a few fabrics from the stash to fill in. The white is Kona cotton.

I so rarely make baby quilts, but I should do it more often. They are so fun to finish up. The quilting is a breeze, because they are so small. But the selfish part of me doesn't like to make baby quilts because I know I will never get to use them. It's silly, I know.
I pieced the back because the fabric I had was just a touch too small. Looking at this photo, I kind of wish I would have added in some white on the back for some contrast. Oh, well.
My daughter was my quilt holder. She was complaining about her tired arms after just a few photos, so I had to settle for a crooked one. ;)
More wavy grid quilting and more lime green binding to finish it off. I'm very pleased with how this quilt ended up.

The quilt measures 35" x 47". There is a tutorial is here. If you make one, I'd love to see it!

gingham

Quilting isn't a good hobby for a perfectionist, so says my sister, and I have to agree. This quilt has a few issues (that I won't outline here), but I have to say, it does look good from a distance. And really, the issues aren't all THAT bad, but I have a strong perfectionist streak, so they bug me! 

I'm not sure why I had to make gingham. I guess once the idea popped into my head, I just had to do it. I'm really glad I did! I could go crazy making this in so many color ways. I debated adding something to the quilt top, as you may remember, but in the end, I decided to keep it plain old gingham. I'm very happy with that choice.
I backed it with aqua (Wendover Aqua Sky from Hancock Fabrics), and did simple straight line quilting echoing the seam lines by 1/4". Well, the lines are supposed to straight.
The lime green solid (I'm pretty sure it's Country Classic Cotton in Lime from JoAnn's) is a little more "electric" than I was hoping for, but in the end I think it works pretty well. I love that this ended up being a gender neutral quilt. My boys both want it, but I'm not sure that they need any more quilts. I also love that this is one quilt that I can cross off my WIP list. Yipee!

The quilt measures 48" x 66".

another guitar strap

This guitar strap was a custom order for a friend. It will be a going away present for her daughter when they move in a few weeks. The plan is for all of her friends in the youth group to sign the guitar strap for her. Isn't that a sweet idea? The solids are from Connecting Threads. I LOVE their solids! And I'm loving the lime and eggplant color combo.

I didn't want to cover the entire strap with stitching, so I kept it simple and did some double stitching on the sides only, to leave room for the signatures.
I used the Ultimate Seam Guide to make the parallel lines. It is slick! I taped the grid to my machine, then used the guide bar (which is adhesive and removable/reusable) to make the outside stitching lines. I moved the guide bar to make a second line of stitching about 1/4" away from the first line. It made things very quick and easy. And amazingly accurate!
There is no way I could do stitching this neatly without the guide. I think it will work well for hemming things, too. Hurray for handy tools! I always say that I'm not a gadget girl, but I think I just may be becoming one.

I wanted to say a big THANK YOU to all of you who have left such kind comments here recently. They are much appreciated!

apple cake quilt top

My daughter inadvertently named this quilt. She confused "applique" with "apple cake". That makes me grin. I love the name, so it's sticking. Only half the quilt is shown in the photo here, as it's draped over the railing. I need to baste it and then work up the courage to start hand quilting it. It's gonna be one of my favorites, I can already tell. I loved making this quilt!

A few details....It's all freezer paper appliqued by hand from my stash. It was inspired by Nanette's blocks. My background blocks are 4 1/2" cut and 4" finished. I simply drew a leaf shape to fit the block size (leaving 1/4" seam allowance, of course) for my pattern. The quilt top measures 56" x 70".

Happy Monday to you!

oh my stars!

I am so enjoying working on this quilt!!! It is definitely all about the process. It is going to take forever! But no worries, I enjoy hand stitching very, very much. There is one thing that I try not to think about while I am stitching, namely, it will be a completely hand pieced quilt top. That seems ludicrous. But then again, why not, right? :)

edited to add: I wrote about the specifics of this quilt in this post, including the link to the video tutorial.
-----------
Is blogger acting weird for anyone besides me? I had a friend tell me that my last post disappeared. She saw it in her reader, but it wasn't on my blog. It later reappeared, but it ate all my comments. :( It's kind of frustrating. So if you left a comment in my last post and it disappeared, don't worry, I didn't delete them. I appreciate each and every comment. I guess blogger must have had a hiccup. Anyone else notice anything funky?

design wall

I've noticed that my design wall ends up being a place for block storage rather than for designing. But I don't really mind. If nothing else, it's good to keep the blocks out in the open so I don't forget about them. :)

I almost always end up designing on the floor instead. It's easier to shuffle things around.
This was going to be the start of a kitchen sink quilt, but I wasn't feeling it. Yet. Rather than force the issue, I threw all the blocks into an orphan box and I'm letting it process a bit more. Maybe if I work it out in my head first, I'll avoid some major stitch ripping. Here's hoping so! I guess I have plenty of other things to work on until (further) inspiration strikes.

easy as pie

The Easy as Pie quilt is done! I sure love simple quilts that show off all kinds of pretty prints. Tara helped me pull fabrics for this quilt when she came to visit in February. It's always interesting to see my stash through other peoples' eyes. She added a few fabrics into the mix that I never would have thought to put it in, but I love how they all work together.
If I ever grow up as a quilter and I have my own signature style quilting, I'd like this to be it. It's relaxed, easy to do and adds a bit of movement to the quilt. I haven't washed it yet, but I have a feeling that it will have a great texture (even better than it is now, I should say!) after I do. The quilting lines, which are done with a walking foot, are about 1 1/4" apart. Just the right density to keep the quilt together for a long time, but far enough apart to maintain softness in the quilt.
This backing is something that I came across at JoAnn's, if you can believe it. It is THE perfect red, it was half price and I was amazed at how good it felt. Gotta love that! I just love red polka dots!! I bound the quilt in a sweet lime green print from my stash.
The quilt finishes at 58" x 70".
If you want to make a quilt like this, you can find the tutorial for the Easy as Pie quilt here.

Happy Monday to you!

winner

The winner of the book Modern Log Cabin Quilting is Momma Yen. Momma Yen, please send me your address. Thanks to everyone else for playing along. I loved reading your comments. Have a great Thursday!

my new baby

Last week I got a GO! baby fabric cutter. The main reason I wanted one of these cutters is so I can cut about a million 2 1/2" squares. I LOVE 2 1/2" squares, as you can see herehere, here, here and here. They are a pain to cut individually, but the Go! cutter makes quick work of them.
I've been getting acquainted with my new cutter by cutting down as many of my scraps as I can, starting with the ugly ones. Or should I say, the less than appealing ones. I'm working my way up to the pretty ones. I've made some progress, I'm happy to say. And just in time...my scraps were ready to take over!

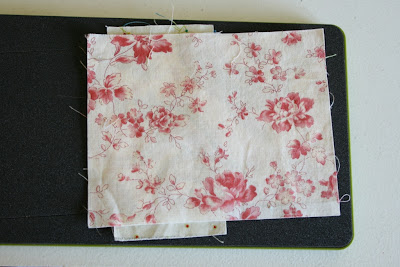
Using the Go! cutter is easy....
lay the fabric on the die, making sure to align the grain of the fabric to the angle of the die,
 lay the cutting mat on top (as you can see, it's gotten some use already!)
crank the entire thing through the Go! baby
and almost instantly, the pieces are cut
there isn't a lot of waste....but if you know me, you know I won't toss all that
a few quick snips with a scissors or a few quick slices with the rotary cutter leaves you with tidy scraps
in the bowl they go with like sized pieces to be used for other projects...like triangles!
my kids love to help! if they are around, they always ask to can turn the crank
It folds up and becomes very compact. It's lightweight and portable, too.
The pieces shown were cut using the value die. It has a 2 1/2" square, 2 1/2" half square triangles, and a 4 1/2" square. The triangles are cut with the dog ears already trimmed, which is extremely handy!
Here are two of the little half square triangles sewn together. This little block will finish at 2" square. Oh, my! But then again, I'm not a stranger to insane scrap projects. I rather like them. :)

Modern Log Cabin Quilting

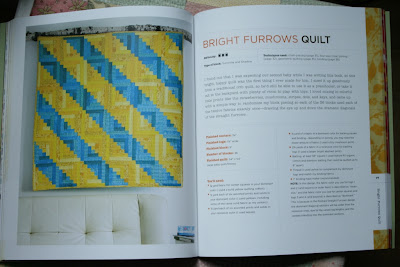
I'm happy to have the chance to review a copy of Modern Log Cabin Quilting, by Susan Beal. This beautiful book includes a brief history of the log cabin quilt, a section about choosing fabrics and materials, a quilt making basics section, and 25 patchwork projects. The projects are broken down into 3 sections: Quilts, Home Decor and Bags & Beyond. There are so many great ideas of what you can create using the log cabin block as your jumping off point. My personal favorite from the book is the quilt on the cover. I was smitten at first sight. After reading through the pattern, I think it's genius! I'm excited to make my own. It's simple and stunning...just my kind of quilt. :)

A few other things I loved in the book:
This inspiration quilt....made in 1865. Kinda looks like our modern quilts, eh?
I loved the simplicity of design and bold colors in the Straight Furrows quilt.
The starry night pillow is great, too.
The kind folks at Crown Publishing are offering up a free copy of the book to one of my readers. If you would like to win a copy, leave a comment in this post. In your comment, let me know what you are up to today. Personally, I'm going to go run some errands and pick up ingredients to make a huge kettle of soup. Yes, it's May 2 and it was SNOWING this morning! I'm none too happy about it, as you could probably imagine! So, I'm going to make some soup, hunker down with some quilting and try to make the best of it. After all, I do have a few quilts to work on. ;)

Happy Monday to you!

Oh, and thanks for all the birthday wishes for my daughter. I appreciate each and every one of them!