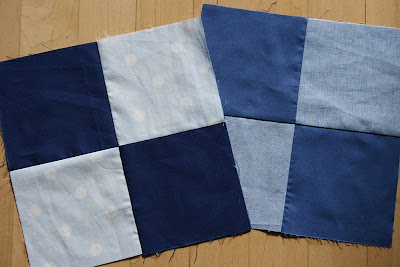
I started with several blue scraps (thanks to Heather!) and cut several 4.5" squares with my Go! baby while talking to a very good friend on the phone. (I love multitasking!) The go cutter made quick work of the task. Plus, it was easy to do while I was on the phone. :)
My friends and I sewed the blocks together into 4 patches at the beginning quilting class I taught last month.
I had enough blue scraps to make 26 blocks. But how to lay them out to get a decent size quilt? I mulled it over for several days. At this point I also started thinking about what I could use for the back of the quilt.
One night while I was NOT sleeping, I remembered I had this fabric, which would work great for the back. It came from my neighbor, Mary. It was leftover from her son's school project and it ended up in my stash. Who am I to turn away awesome fabric?
The backing choice inspired the addition of a few green blocks. These fabrics came from my stash. I'm so glad I added the green, the quilt would have been very flat without it.
I decided to use my fair and square pattern, so I trimmed all 33 blocks down to 6.5" square.
I did a quick layout on my floor, then added some gray sashing. (The color is ash from connecting threads. Best gray ever!)

Here's the finished quilt top! I wasn't sure I was going to like it before I sewed it together, but now I am pleased as punch! My son just told me that it looked kinda weird and kinda cool. Ha! Good to know! :)
So there you have a slightly scary look at the inner working of my brain and how a quilt comes together. :) Lots of using what I have, using what others share with me, and bits of inspiration during sleepless nights. That about sums it up!


