So here we go...(and thanks for all your excitement about this...I'm very excited, too.)
Today's tutorial is for checkbook covers. I have 3 varieties....

We'll start simple....

cut 2 rectangles 7" x 13". I used regular cotton fabric, so I added interfacing on the back.

Place 2 rectangles right sides together and pin well. Leave a 4" opening for turning.

Use a 1/4" seam allowance and sew around the perimeter (except the 4" gap for turning). back stitch at the beginning and the end of the seams.

trim corners

press well

sew around the entire perimeter using a scant seam allowance. (this will also close up the opening used for turning.)

fold down one end 2.75" and pin

sew, again, using a scant seam allowance, starting at the top (of the red) and going down to the bottom (of the red) of the folded piece. (basically, you want to make 2 little pockets. it's hard to explain, easy to do.) repeat this 3 times.

and you are done.

easy peasy, right?

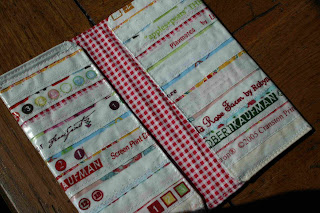
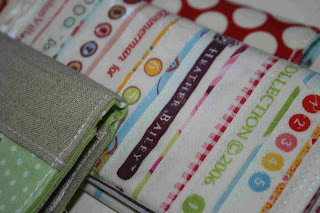
I made one using selvages!!! How fun is that? There are a few changes for this version...

I foundation pieced the selvages onto a light-colored piece of fabric so there is no need to interface this one. Also, I used iron on vinyl to cover it so it will wear longer. The iron on vinyl is easy to use, if you haven't tried it before. There is one thing...you can't really rip out your stitches with the vinyl or you will have several holes, so just make sure that you are sewing accurately the first time.

It's a little wrinkly because I have been using (and showing off) this one already. It makes me giddy. It really does.
And the third version is a patchwork and linen cover.
Make a strip of patchwork 7" wide by 1.75" or so.

Trim patchwork to 1.5" high

the linen rectangle on the left measures 9" x 7"
the strip of patchwork measures 1.5" x 7"
the linen rectangle on the right measures 4" x 7"

sew together (pin the patchwork well...it will stretch very easily)
press seams toward the linen, not the patchwork
(I used interfacing on the linen after making the patchwork and I interfaced the lining, too.)
trim the entire linen piece to 13" x 7"

to give the patchwork more durability, I top stitched on each side of the strip

finish as shown above

isn't this one cute too? I really, really like it. A lot.


If you have any questions, I'll try to answer them in the comments.
If you would like to win one of these, leave me a comment, and I'll pop the checkbook cover of your choice in the mail. US and Canada only this time, please.
Thanks for reading and happy sewing!